
As we all know, content is king, and content wouldn’t be engaging without media. Helpful images, relevant documents and infographics all add to the desired effects of your blog posts and web pages. Whether those effects are to inform customers about your products, launch events, or even just to let people know you’re out there.
Fortunately, handling media in Umbraco is a breeze. Any kind of media item (images, documents, files) can be uploaded, and these can be stored in any number of folders, just like the filesystem on your PC!
Here’s how Umbraco handles media:
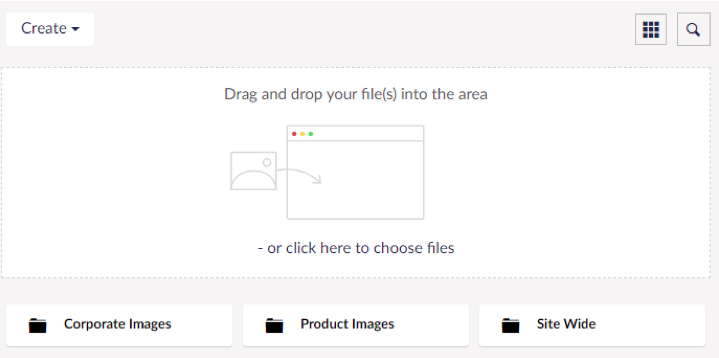
- You can group your images and documents into folders
- Nifty drag and drop function
- Full search ability
- View by grid or list options
As with content nodes in Umbraco, any number of customisable fields can be added to images, files and folders. Below we’ve added a standard Alt field for image alt text and a couple of crop options for the image if it’s used as a banner or range (thumbnail) image:
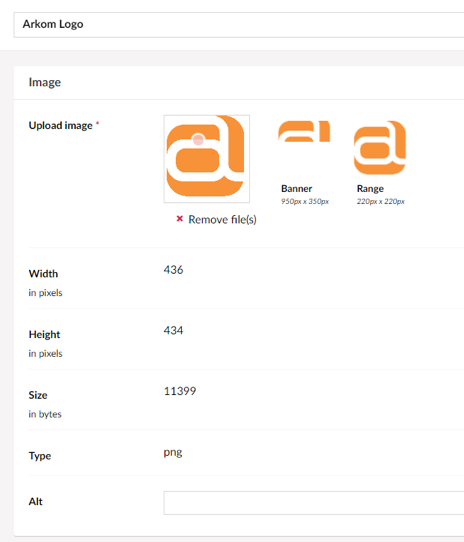
You can also add fields to change what size image is pulled from the server with different screen sizes (if we really wanted to be picky!).
This is a different approach to some other CMSs, as it encourages users to upload one high-quality version of an image, do cropping and image rotating in the CMS. This means, when possible, we can render the best quality image for a given size on the frontend website.
Get in touch to find out how we can use Umbraco on your next project.